IIS and ASP.NET 4.0 Settings before Installing
Before installing Astrow Web, you need to check the webserver IIS compatibility and the ASP.NET v4.x pages working on your server operating system.
Step 1: Install ASP.NET 4.x.
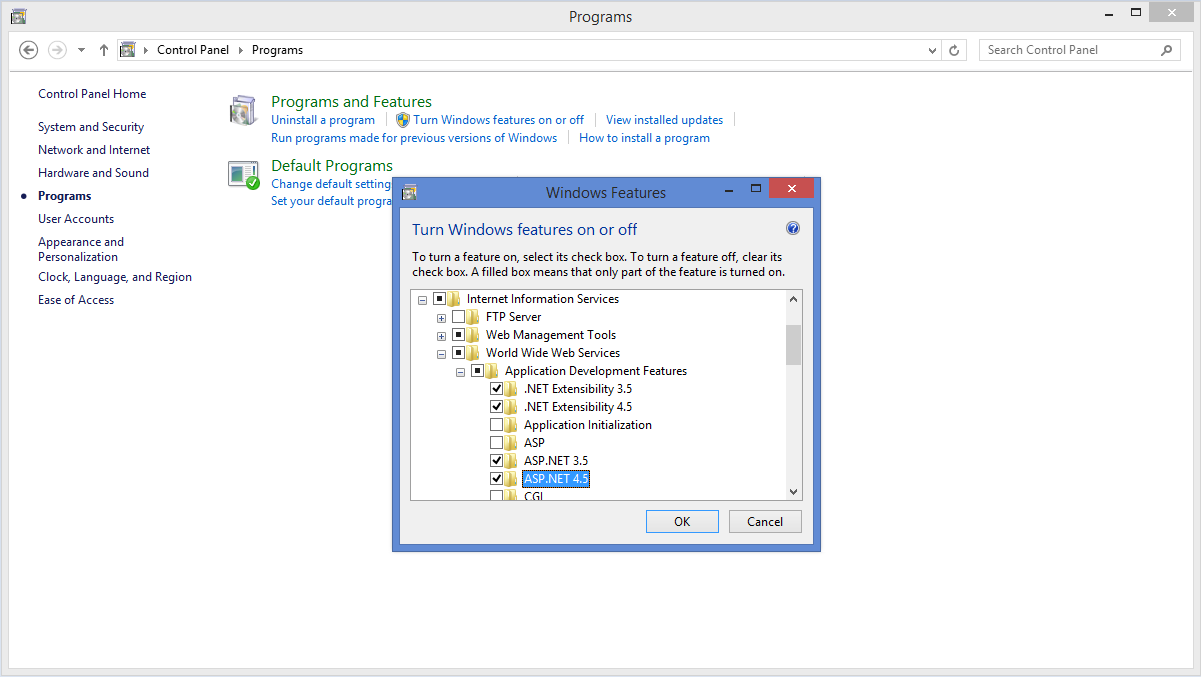
To install ASP.NET, go to Start - Control Panel - Programs - Programs and Features - Turn Windows features on or off - Internet Information Services - World Wide Web Services - Applications Development Features and check ASP.NET 4.x.
 |
|
Installing ASP.NET
|
|
|
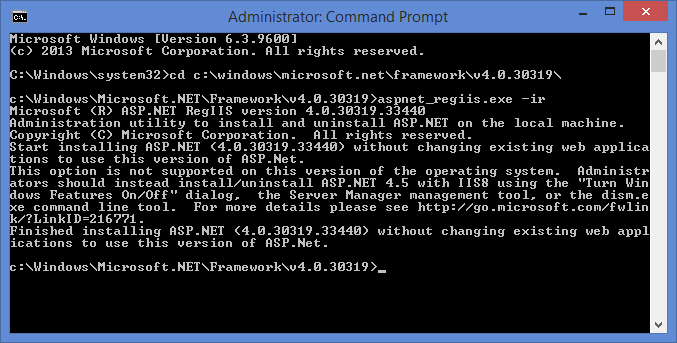
In case .NET Framework 4 is installed after IIS, you need to register .NET Framework 4 into IIS to see it and to make it possible to assign it to the Astrow Web application.
Step 1: Open a command prompt.
Step 2: Browse to c:\Windows\Microsoft.NET\Framework\v4.0.30319\ by typing cd c:\Windows\Microsoft.NET\Framework\v4.0.30319\
Step 3: Type and run next command aspnet_regiis.exe –ir
 |
|
|
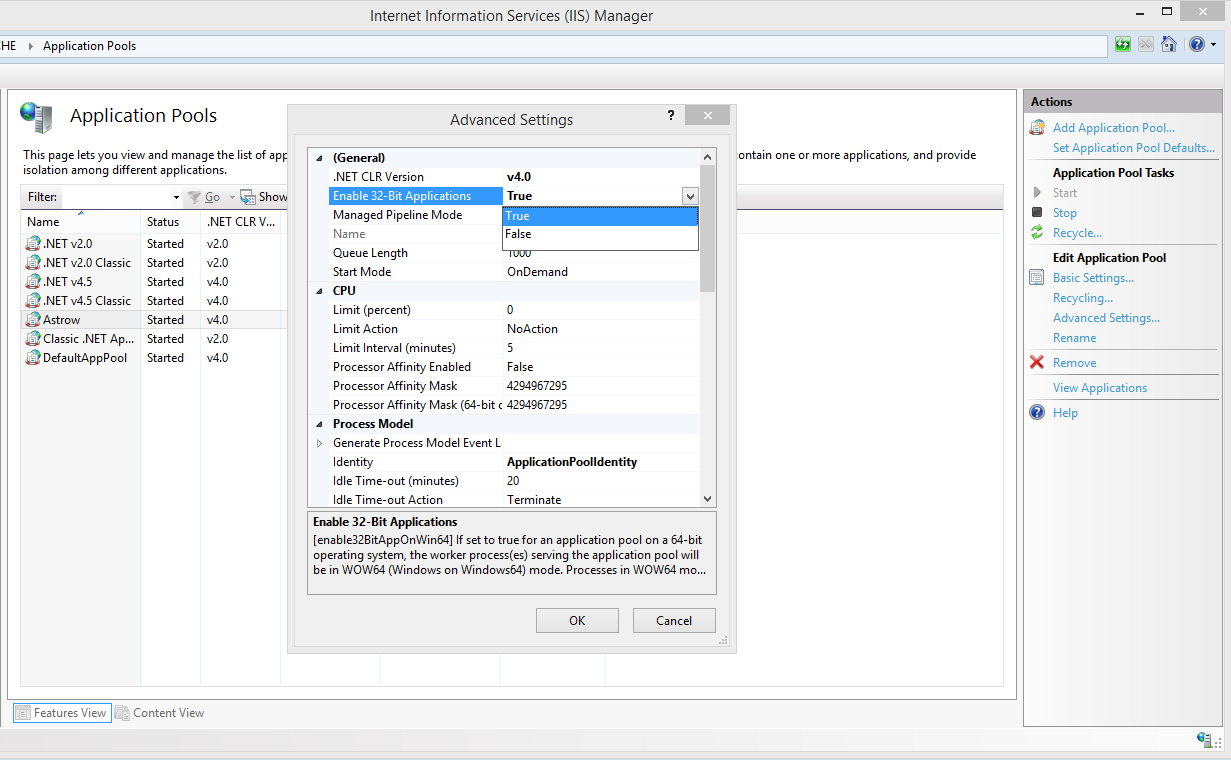
For Windows on 64 bits, go to Internet Information Services (IIS) Manager and select Actions - View Applications Pools:
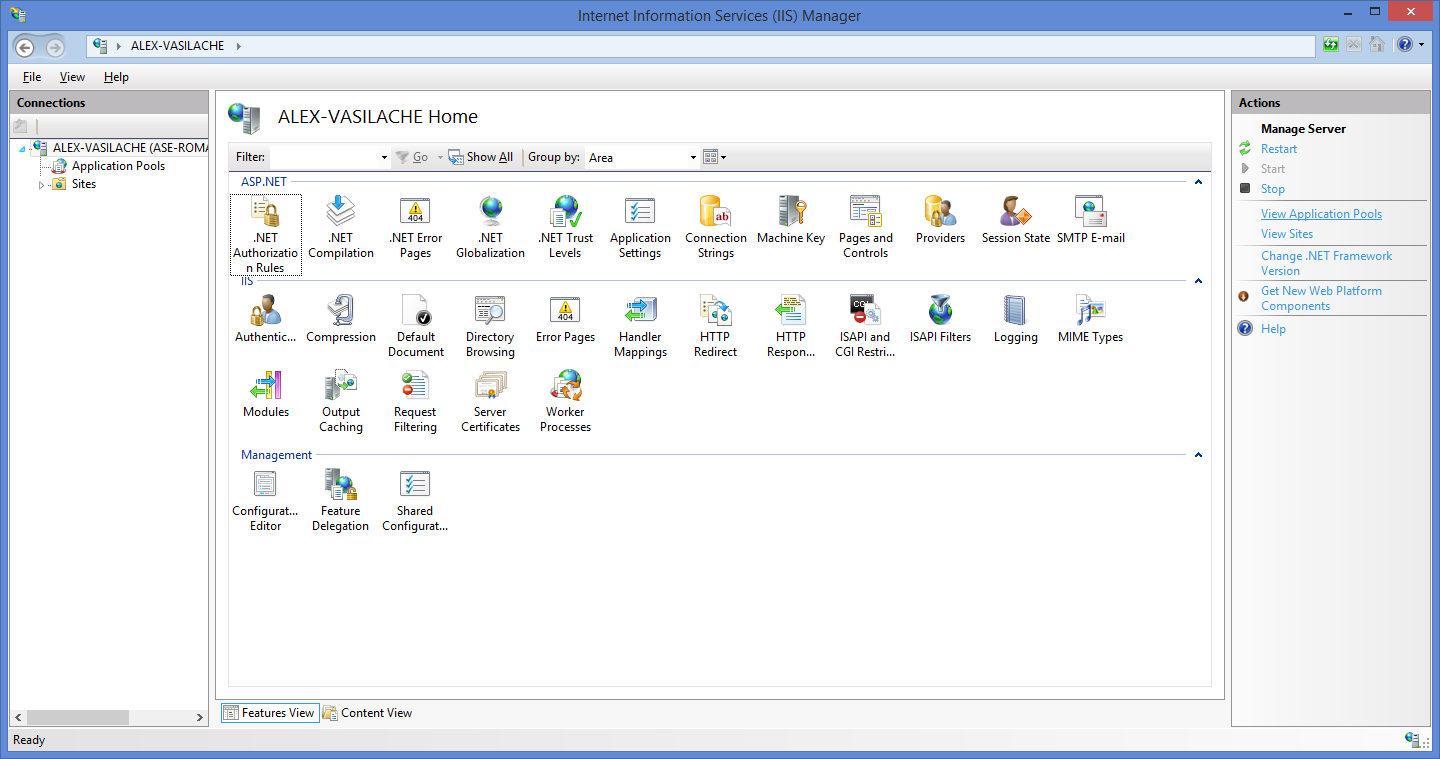 Select then Astrow and Actions - Advanced Settings...:
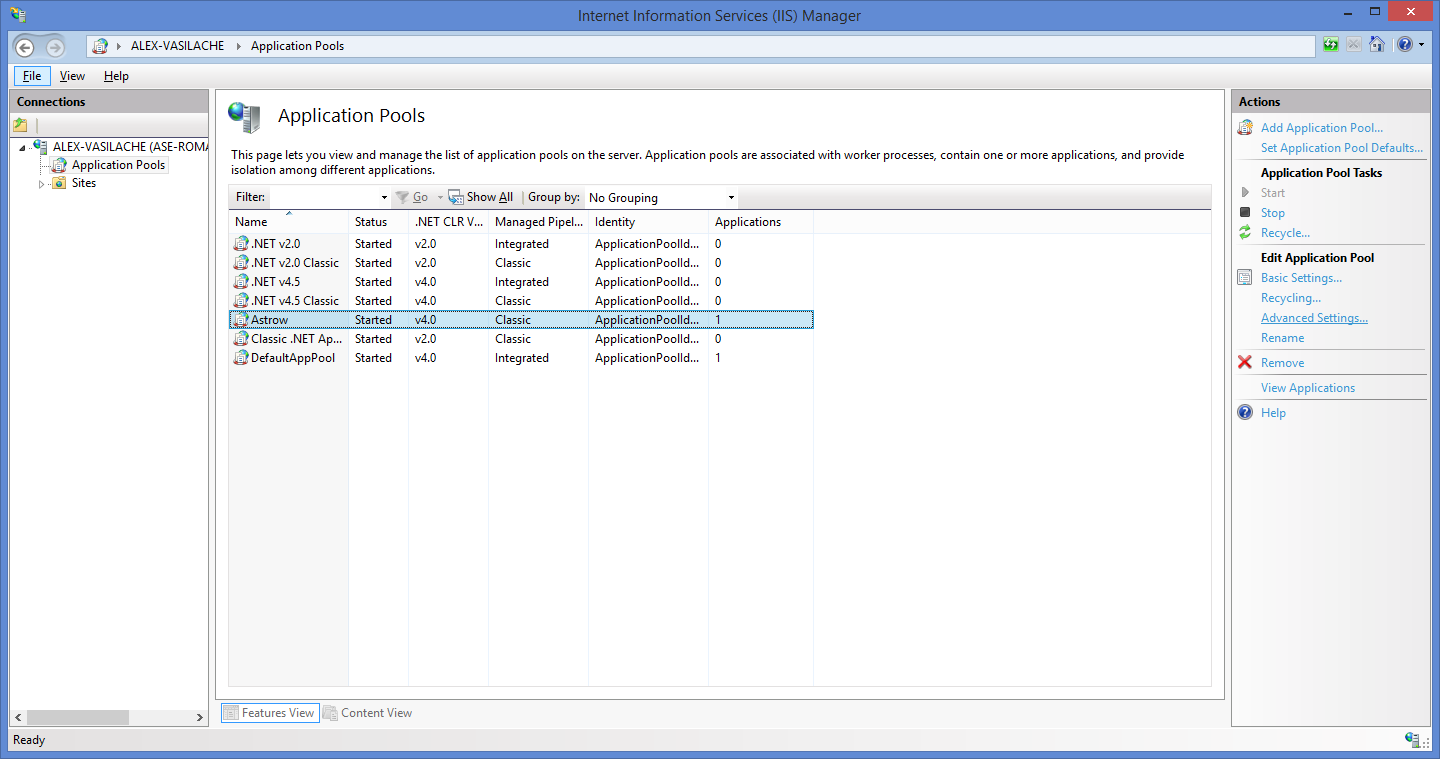 Put parameter Enable 32-Bit Applications on True.
 |
Step 2: Check IIS compatibility.
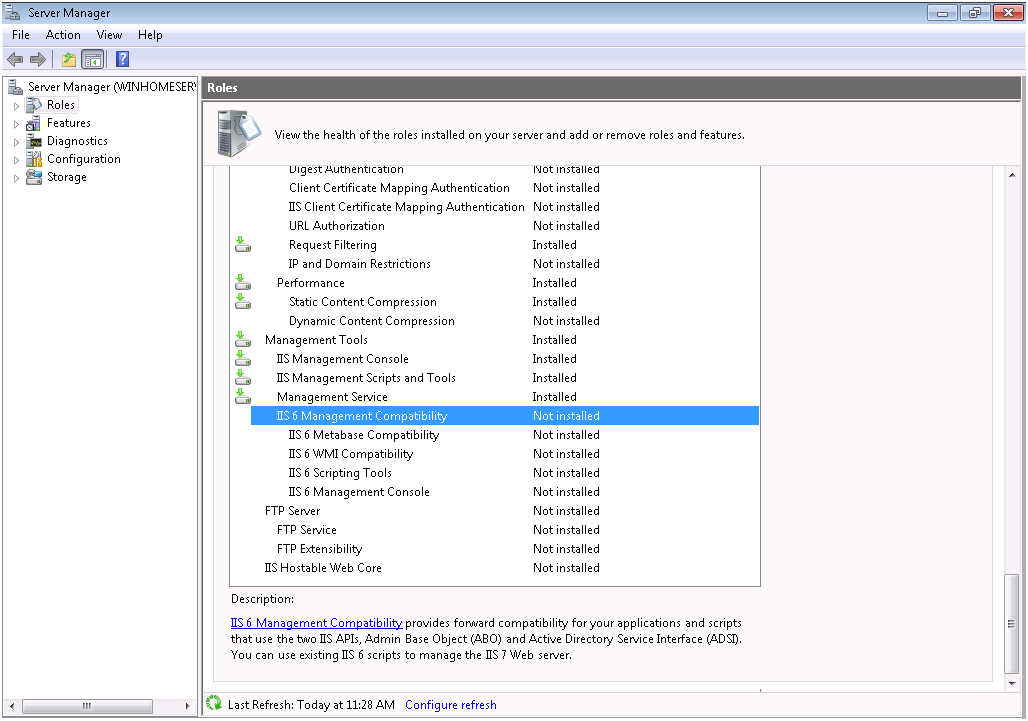
To check IIS compatibility for Windows Server 2011 (2012), first go to Start - Control Panel - Programs and Features - Turn Windows features on or off. Then go to Web Server (IIS) - Role Services and check the status of IIS 6 Management Compatibility. The status should be Installed.
 |
|
Checking IIS Management Compatibility on Windows Server 2011
|
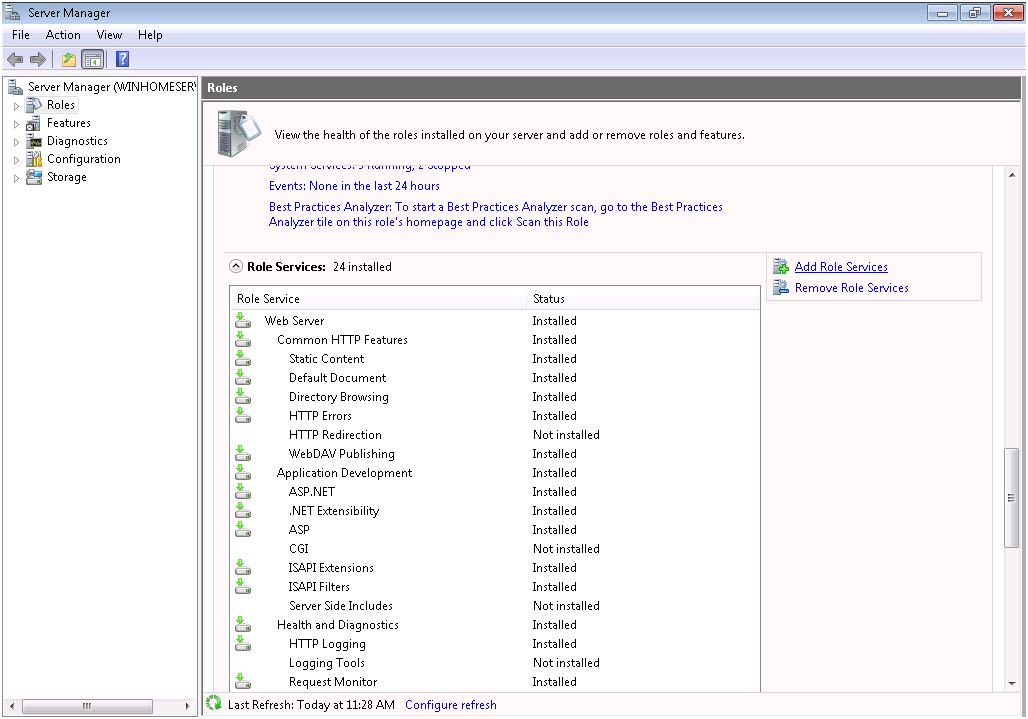
If not installed, click Add Role Services.
 |
|
Add Roles Services for IIS Management Compatibility on Windows Server 2011
|
Check IIS compatibility options and click Next. The installation will be done shortly.
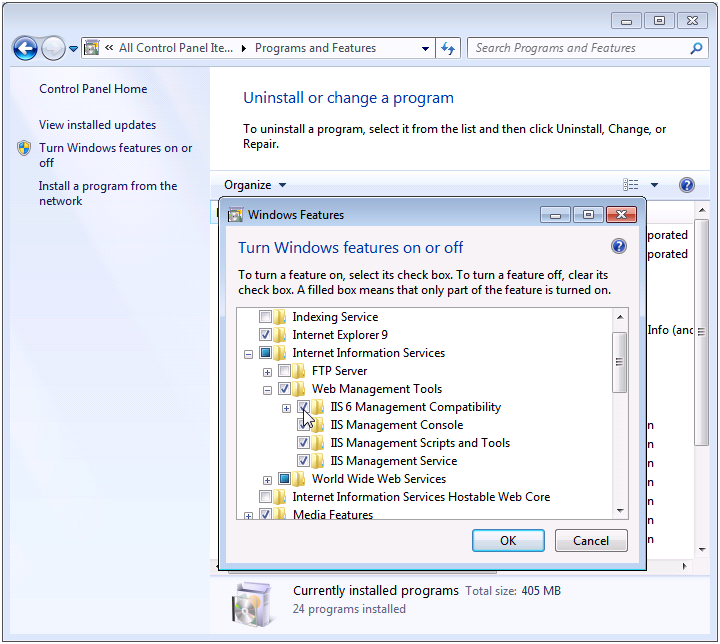
For Windows 7, go to Start - Control Panel - Programs and Features - Turn Windows features on or off. A new window will be displayed. Go to Internet Information Services - Web Management Tools and ensure all IIS 6 Management Compatibility options are checked.
 |
|
Checking IIS Management Compatibility on Windows 7
|
Step 3: Allow ASP.NET on ISAPI and CGI Restrictions.
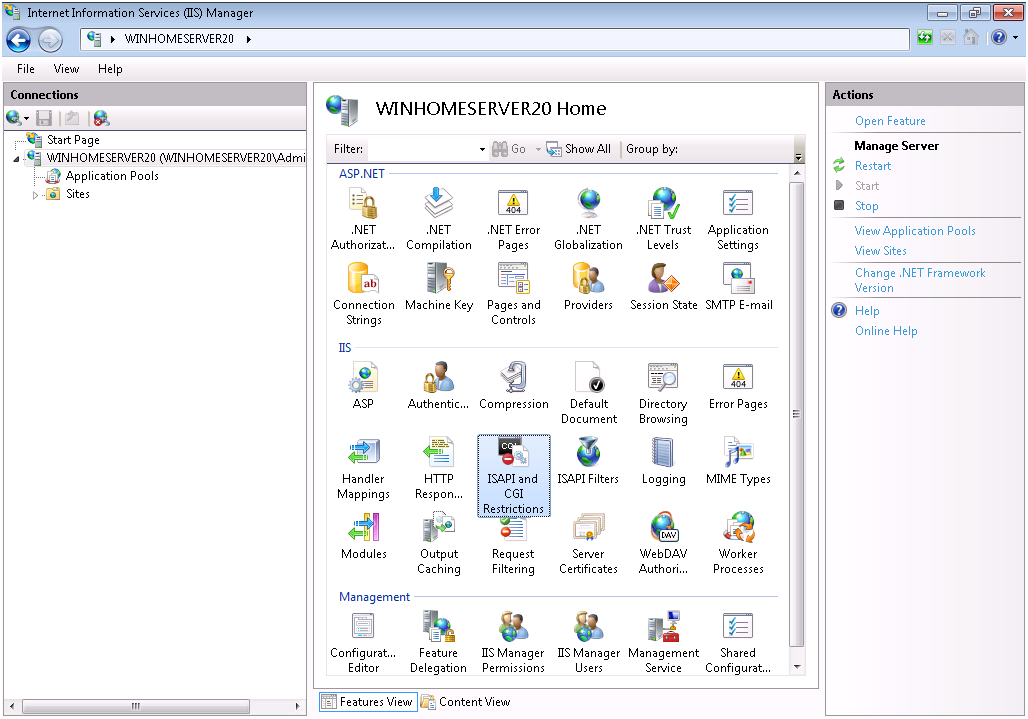
To check ASP.NET v4.0 working pages on Windows Server 2011, go to Start - Administrative Tools - Internet Information Services (IIS) - ISAPI and CGI Restrictions.
 |
|
ISAPI and CGI Restrictions on Windows Server 2011
|
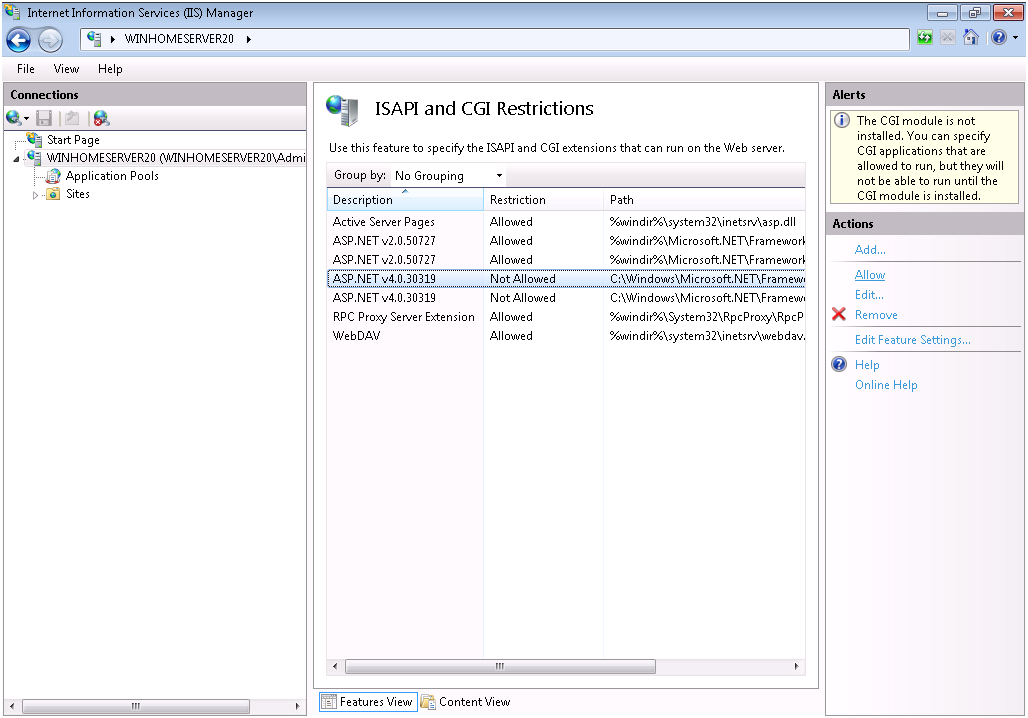
Make sure all ASP.NET v4.0 active server pages are Allowed. If Not allowed, select the pages manually and click Allow.
 |
|
Allowing ASP.NET V4.0 pages on ISAPI and CGI Restrictions on Windows Server 2011
|
For Windows Server 2011 and 2012, go to Start - Control Panel - Administrative tools - Internet Information Services (IIS) - ISAPI and CGI Restrictions, select the ASP.NET v4.0 pages manually and click Allow.
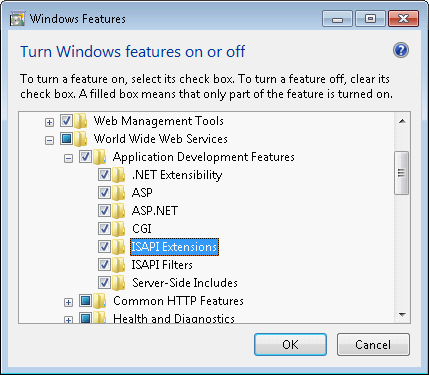
For Windows 7 and up, go to Start - Control Panel - Programs and Features - Turn Windows features on or off. A new window will be displayed. Go to Internet Information Services - World Wide Web Services - Application Development Features and make sure the options CGI and ISAPI Extensions are checked.
 |
|
Allowing ASP.NET V4.0 pages on ISAPI and CGI Restrictions on Windows 7
|