Here you can define the terminals used for bookings and run simple or advanced communication commands for each terminal defined.
New GS access terminals will be defined exclusively in Access - GS Manager and will run with a license for Access. For compatibility, only old type GS can be defined here and it runs with a license for GS door.
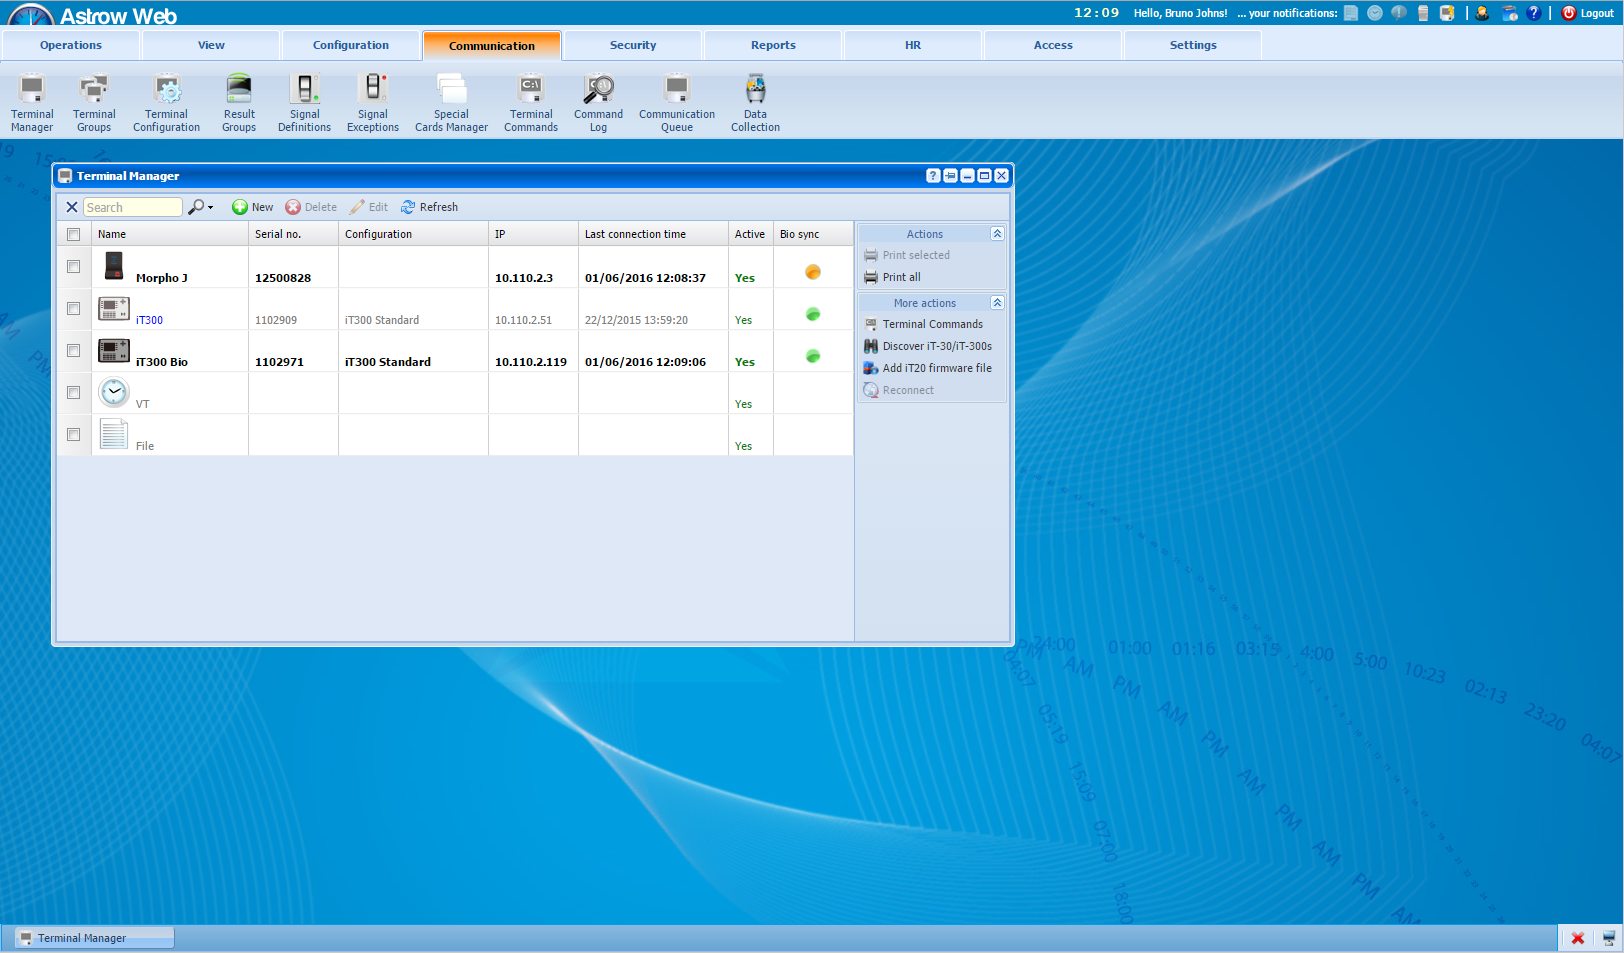
To operate with terminal manager, go to Communication - Terminal Manager. Terminal Manager window opens:
Terminal Manager window in Astrow Web
To add a terminal, click and define it. For iT30 terminals, use the option . This is a search in the network for all existing terminals type iT30, already defined or not in Astrow Web. If not defined yet, you can add them from here (for more details, see Discover iT-30/iT-300 Terminals).
Using command you can update the firmware for all iT20 terminals defined. For more details, see Add iT20 Firmware File.
disconnects the terminal and reconnects it.
To edit a terminal definition, click or double click on it. To delete a terminal from Terminal Manager, select it and click .
Use the option to check all the commands given to the terminal from Terminal Manager. The option is a link to Terminal Commands window (for more details, seeTerminal Commands).
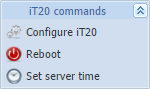
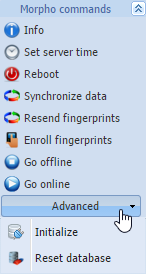
To run a command on a terminal, select the terminal and use the command menu.
Commands bar for different types of terminals in Terminal Manager window in Astrow Web
For more details about each type of terminal available commands, check the following explanations:
Advanced commands are available only with permission Configure Terminal - Advanced or with role Administrator.
The following is a list with other options in Terminal Manager window:
A searching tool by:
Name
Serial number;
Configuration;
IP.
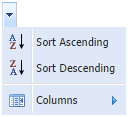
The possibility of customizing the view by sorting ascending or descending the data in columns or choosing to display only some columns from the ones available.
Refresh button.
Possibility of printing the records selected.
Possibility of printing all data available.
Terminals which have operations in communication queue will appear written with red. Terminals that have data to synchronize will appear with blue.
For more information about operations in communication queue, see Communication Queue.
The links below help you define and operate with each type of terminal.