MA500+ terminal can be easily configured at start up.
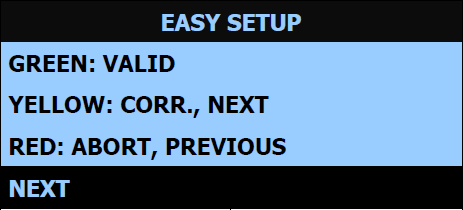
Step 1: Enter the Easy Setup, which should appear at plugging. A help assistant will open:
Terminal Easy Setup screen
Key validates the selection or goes to Next step.
Key erases the last data.
Key aborts operation and returns to previous step.
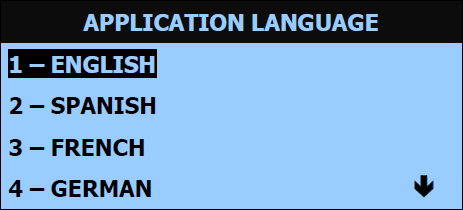
Step 2: PressNext to select the language:
Terminal Application Language screen
Use the arrows to make a selection or just press the key number and press Next.
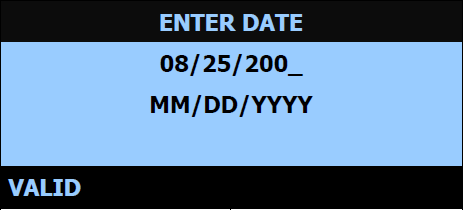
Step 3: Configure the date and time:
Terminal Enter Date screen
Key validates the selection and goes to next step.
Key deletes a character.
Validate and go to next step.
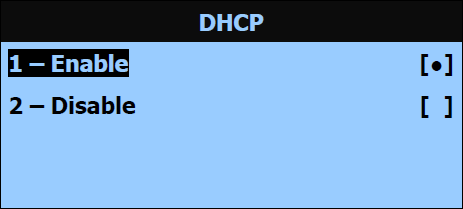
Step 4: Make the IP settings.
The screens will guide you. Press the key 1 if DHCP is enabled, or 2 if it is disabled. You can also use the arrow key to go down.
Terminal DHCP screen
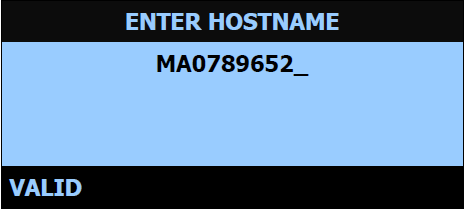
a. If DHCP is enabled, only the terminal hostname is required.
Terminal Enter Hostname screen
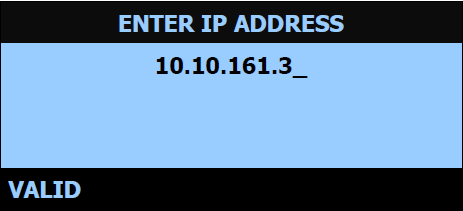
b. If DHCP is disabled, the following parameters will be set:
IP address;
Network mask;
Default gateway.
Terminal Enter IP screen
Key deletes a character. Use the key to validate the data entered.
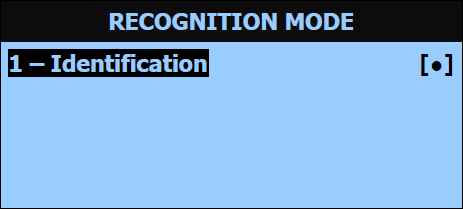
Step 5: Next choose the identification mode:
Terminal Recognition Mode screen
Step 6-7: The next options won't be needed for the purpose of this terminal, in the next 2 screens just press key 4 or use the arrows to go to and validate.
Step 8: Next you will be asked if you need to change the password. Press key to go to next step.
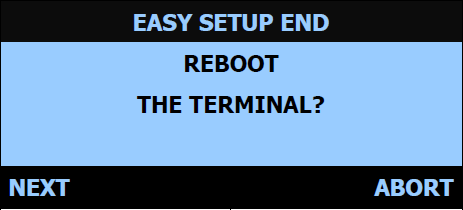
Step 9: Reboot the terminal:
Terminal Reboot screen
The terminal must reboot to validate the changes. Press key to reboot.