When Upgrading Astrow Components
If you upgrade the application, please follow the steps below:
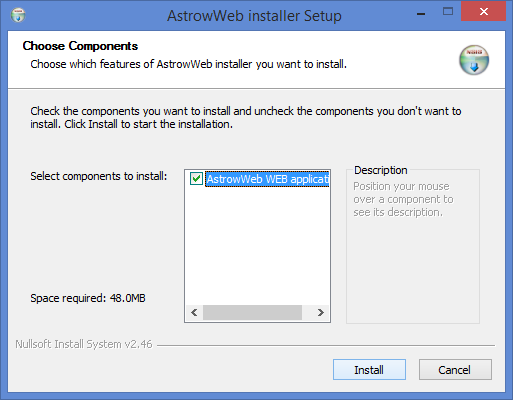
Step 1: Run AstrowWebSetup.exe with Run as administrator and click Install:
 |
|
Astrow Web Installer Setup, Choose components
|
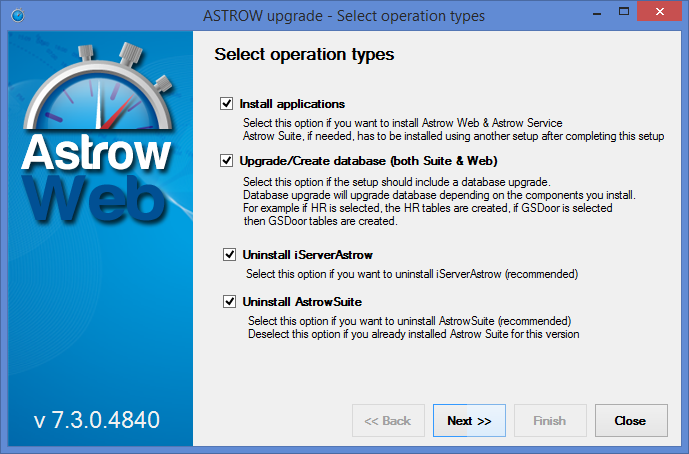
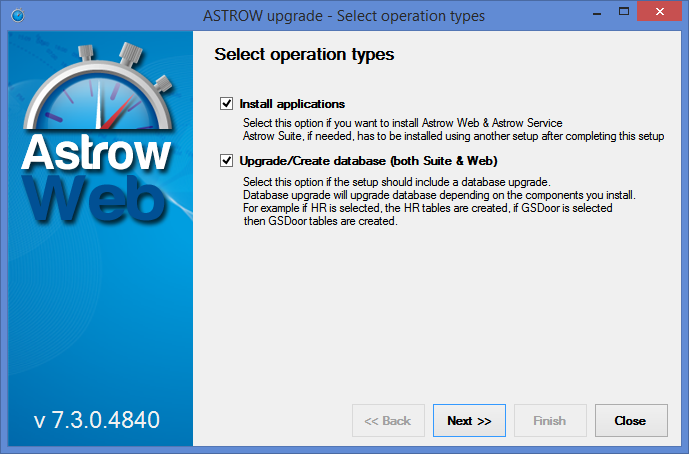
Step 2: Select the operations and Next.
  |
|
Astrow Web Installer Setup, selecting the operations
|
-
Install applications: installs Astrow Web and Astrow Service.
-
Upgrade/Create database: upgrades the database you select or creates a new one.
-
Uninstall iServerAstrow: uninstalls iServer Astrow on the current server (if existing).
-
Uninstall Astrow Suite: uninstalls Astrow Suite on the current server (if existing).
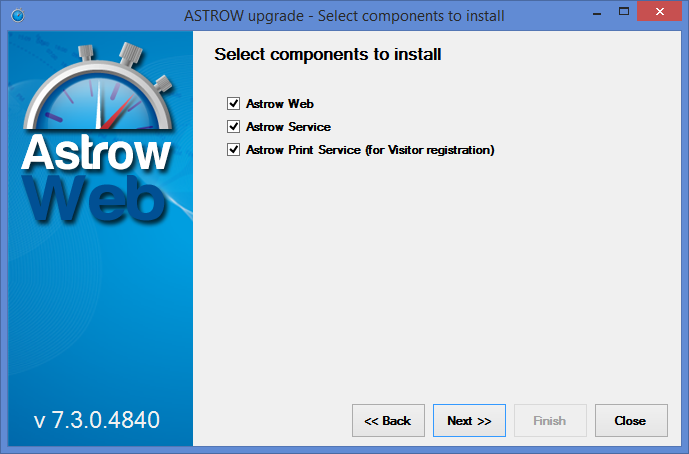
Step 3: Select the components and Next.
 |
|
Astrow Web Installer Setup, selecting the components
|
-
Install Astrow Web: installs Astrow Web on current location;
-
Install Astrow Service: installs Astrow Service on current location (you can have Astrow Web and Astrow Service on separate locations).
-
Install Astrow Print Service (for Visitor registration): installs Astrow Print Service, the service to connect the printer with Astrow. If you don't use the Visitors Registration Print license and service to print temporary labels for visitors, please uncheck this.
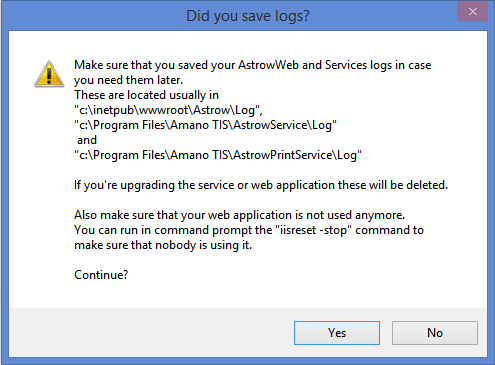
In case you upgrade the service or web application, please save the logs in c:\inetpub\wwwroot\Astrow and c:\Program Files\Amano TIS\AstrowNotificationService\Log. Also make sure Astrow Web is not used by anyone. To check this, go to commnad prompt and execute iisreset-stop.
Click Yes on the confirmation message.
 |
|
Astrow Web Installer Setup, Before installation window
|
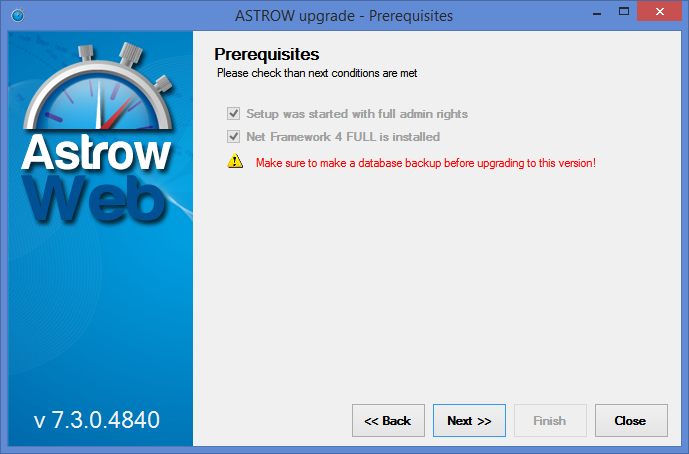
Step 4: Make sure you've run the setup with Run as administrator and you have installed .Net Framework 4 (see IIS and ASP.NET 4.0 Settings before Installing for more details). You also need to make a database backup before upgrading. Click Next to continue.
 |
|
Astrow Web Installer Setup, prerequisites check
|
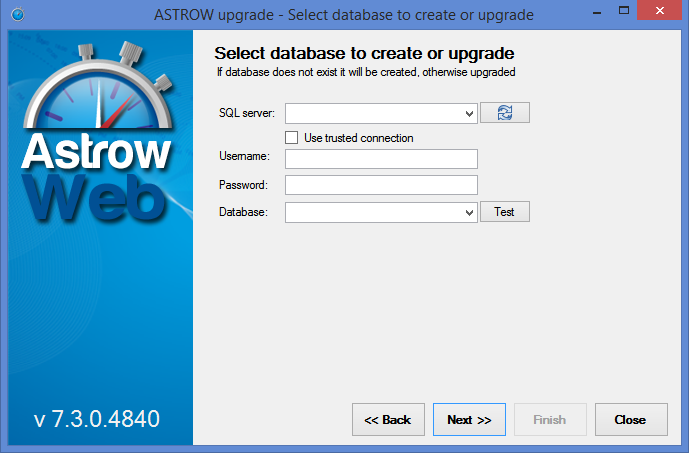
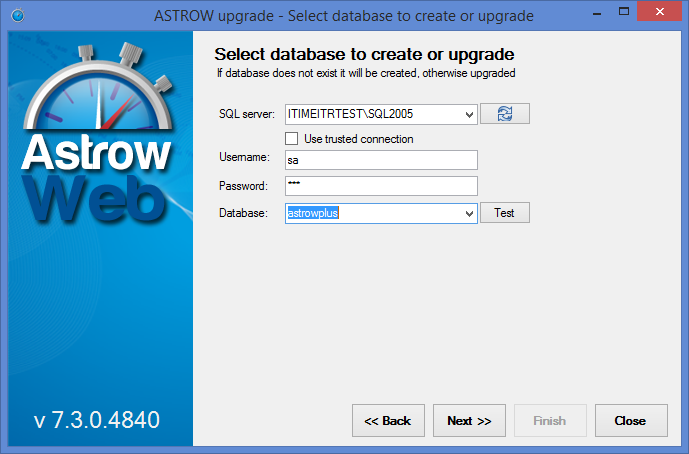
Step 5: Here you can upgrade the database.
 |
|
Astrow Web Installer Setup, database screen
|
Select the SQL server and the database:
 |
|
Astrow Web Installer Setup, creating a new database
|
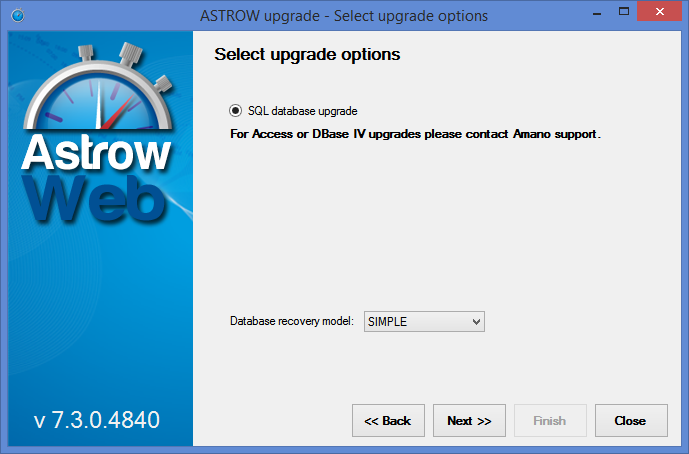
Step 6: Select the option SQL database upgrade and click Next.
 |
|
Astrow Web Installer Setup, selecting the upgrade options
|
SQL database upgrade: upgrades the SQL database;
For conversions from DBase IV and Access, please contact your distributor.
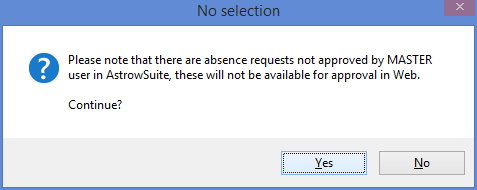
If you upgrade from Astrow Web 4 or 5, please check if you have absence requests in the authorization process. Approve or reject all if necessary, otherwise they will be lost after upgrade.
 |
|
Astrow Web Installer Setup, notification absenses
|
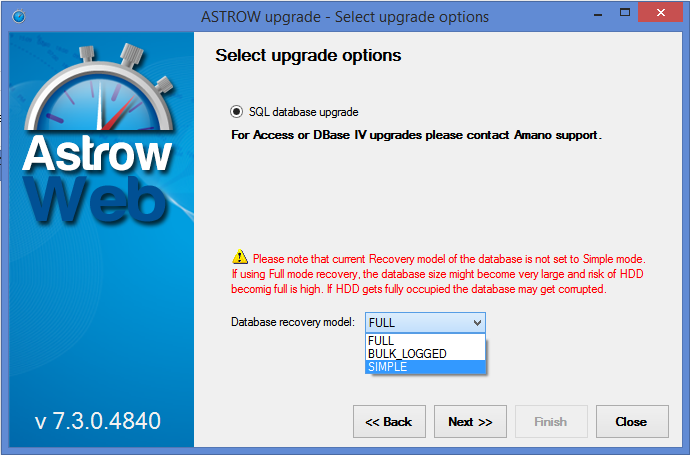
In case your database recovery is Full, please change it to Simple (click here for more information about database recovery).
 |
|
Astrow Web Installer Setup, changing the database recovering model
|
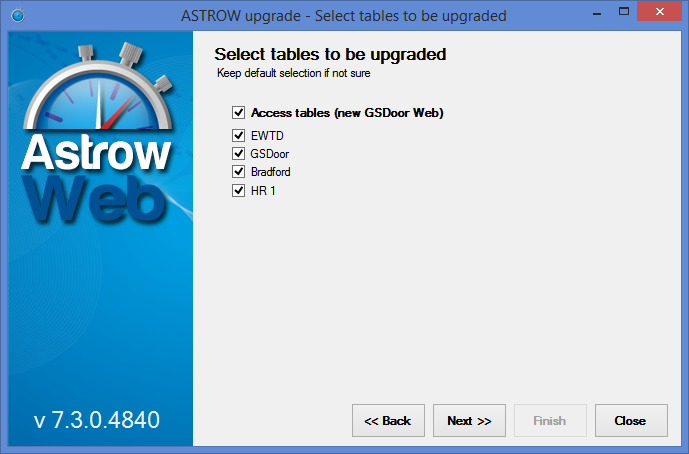
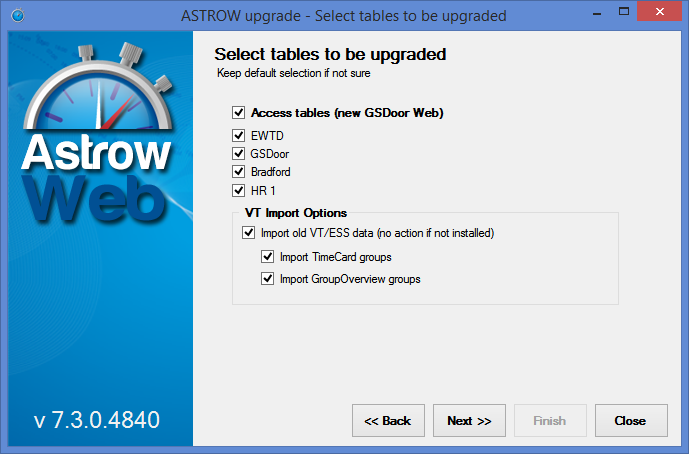
Step 7: Now you can choose the extra options depending on your license. By default those already existing will be selected. Please note that if the tables are not created here, they won't work if the customer decides to acquire a license for any of them in the future. In this case a database upgrade will be needed, to create those tables.
Select the tables you need and click Next.
   |
|
Astrow Web Installer Setup, tables selection
|
You can import VT/ESS old data – in case that there are not VT/ESS tables this will have no effect. Next options are available in Import old VT/ESS Data:
-
Import TimeCard groups – this will import TimeCard groups from old VT/ESS;
-
Import GroupOverview groups - this will import Group Overview groups from old VT/ESS.
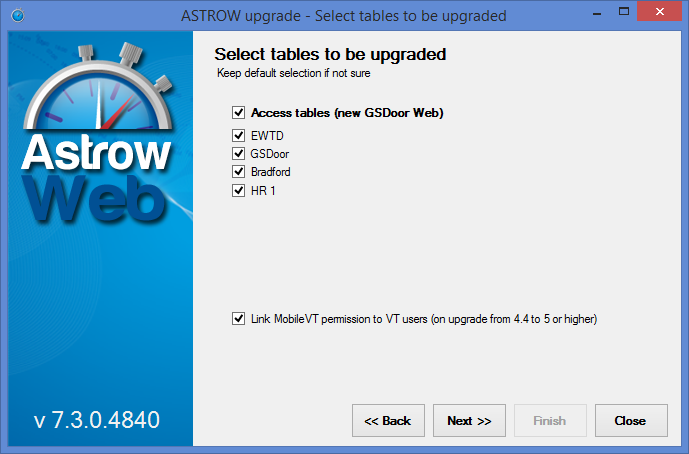
The option Link MobileVT permission to VT users will link the mobile users in this version to VT permissions. This operation is necessary when moving from version 4.4, as starting with version 5 mobile users became independent from VT license!
Step 8: Starting with version 6.0.4, the names of the employees will be split in first name, middle name and last name. You can convert the name when upgrading the database using the guide steps below. Click on Split employee name.
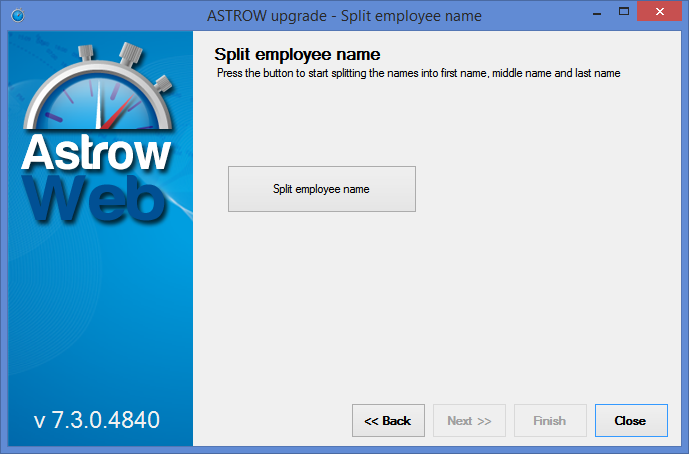 |
|
Astrow Web Installer Setup, split name selection
|
However if you don't want the name to be split just skip with Next. The name will remain in column First name in Employee definition (see Tab System - Add and Edit an Employee for more details).
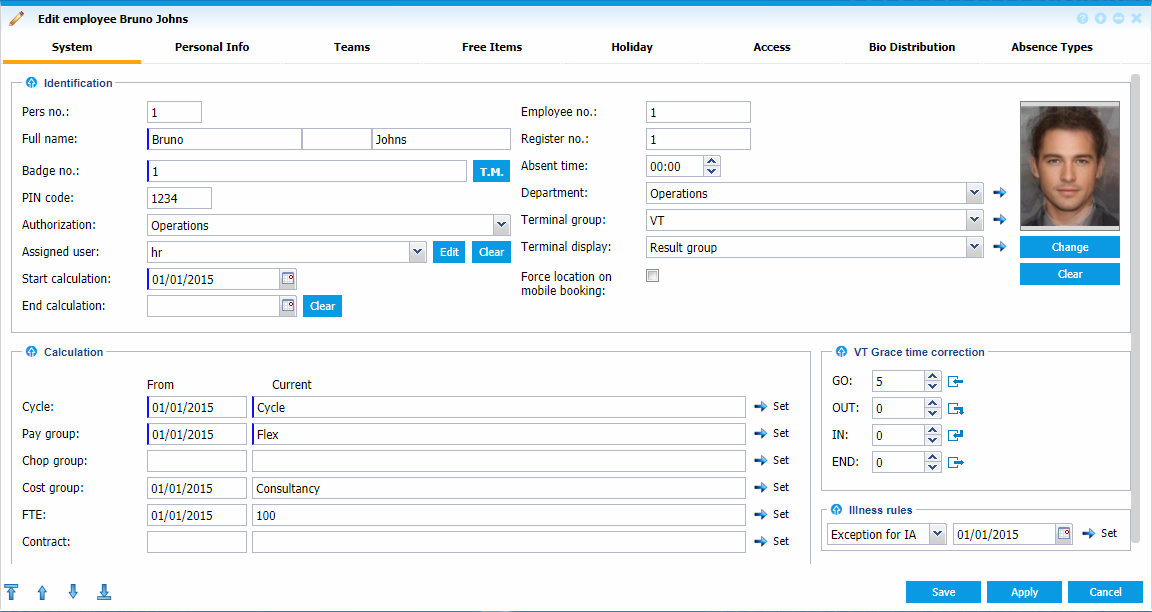 |
|
Split name appearance in Employee definition
|
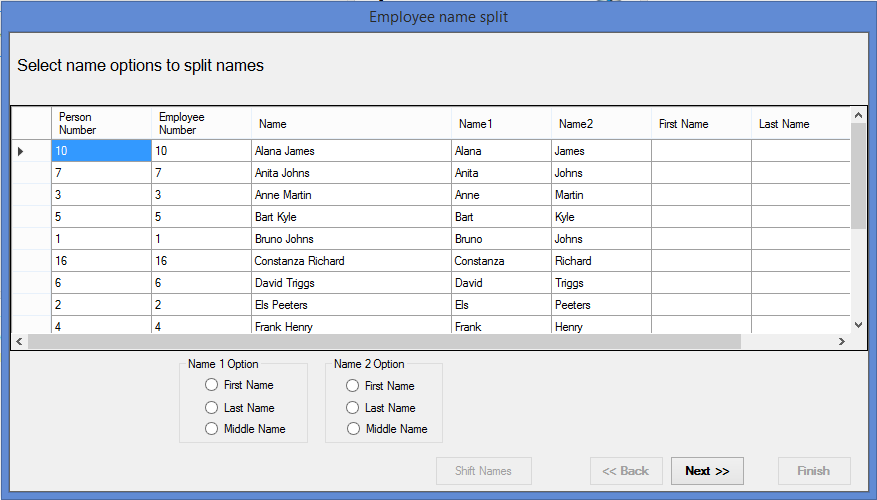
The split is made considering the spaces between the names, so first split is for the names containing 2 entities. Next split is made by the names containing 3 entities and so on, up to 6 entities. For each entity you can choose if the name will be set at first, middle or last name in employee definition.
 |
|
Astrow Web Installer Setup, splitting name options
|
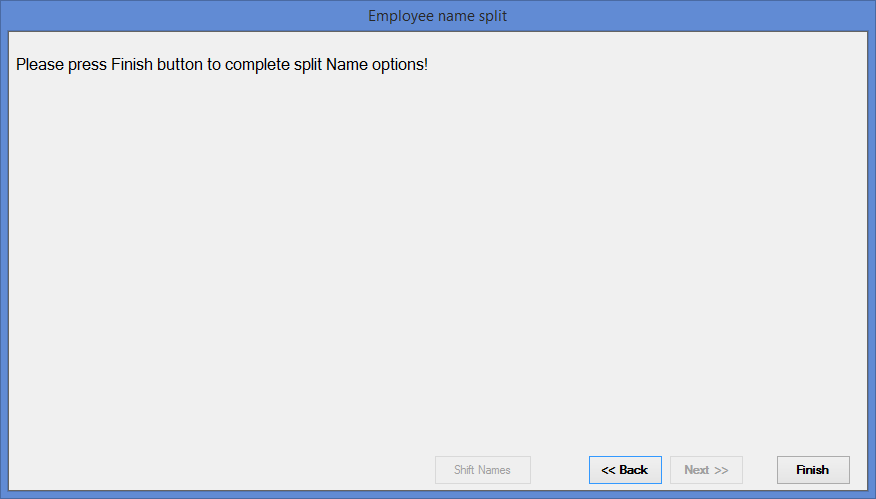
When the split is made, click Next and Finish to continue.
 |
|
Astrow Web Installer Setup, split name finished
|
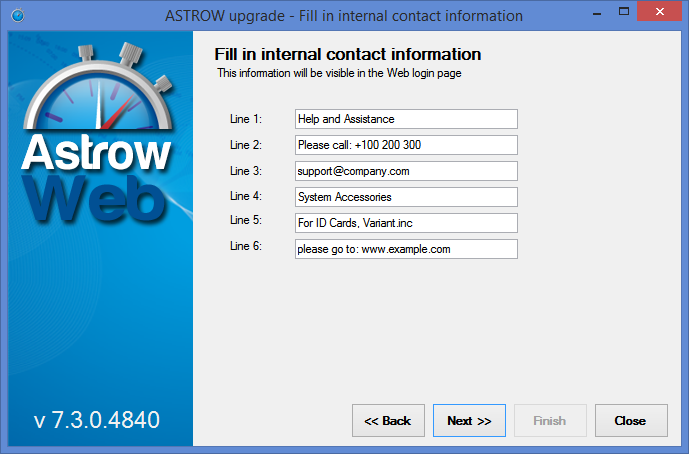
Step 9: Fill in the contact information to appear at login.
 |
|
Astrow Web Installer Setup, filling the information for login page
|
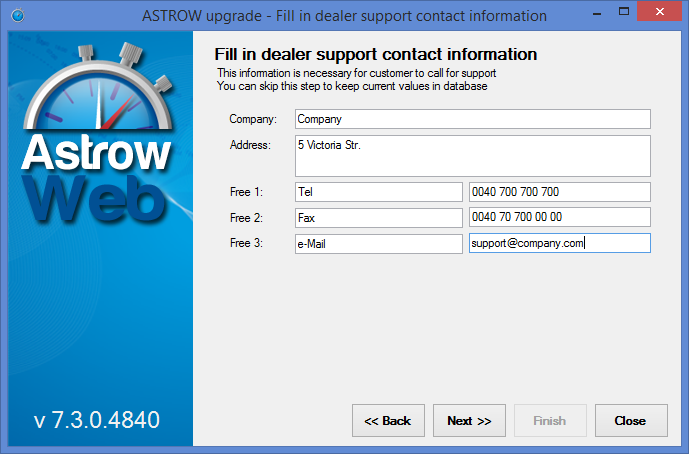
Step 10: Fill in the dealer support information to appear at Support and Information page in Astrow.
 |
|
Astrow Web Installer Setup, filling the dealer support contact information
|
Step 11: Select the service location and the URL.
 |
|
Astrow Web Installer Setup, filling the location and URL for Astrow Service and Astrow Web
|
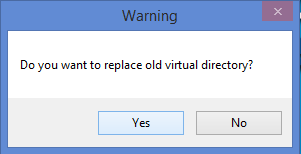
This will install AstrowWeb web application and register it within IIS by default in c:\Program Files\Amano TIS\AstrowService a service used to send notification emails. The URL will have the structure: <server name>/astrow/astrow.aspx. If another web instance is found, you will be asked to confirm the replace of the virtual directory. Click Yes.
 |
|
Astrow Web Installer Setup, replace old virtual directory warning
|
If you need to change the name of the link with: <server name>/[name]/astrow.aspx, you can change it from here.
Click Next to continue.
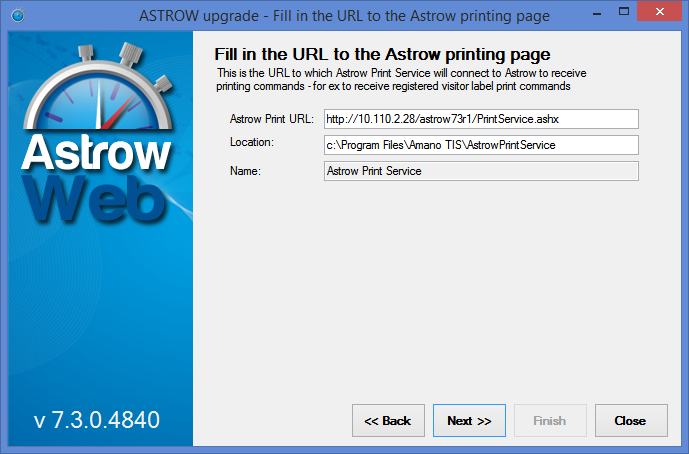
Step 12: This is the URL to which Astrow Print Service will connect to Astrow to receive printing commands. This is necessary only if you use a licence for Visitors Registration Print.
 |
|
Astrow Web Installer Setup, filling URL for Astrow Print Service
|
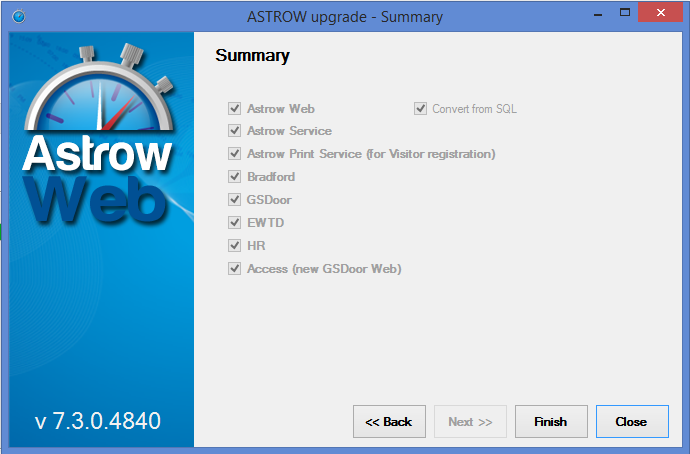
Step 13: Click Finish on the summary.
 |
|
Astrow Web Installer Setup, summary
|
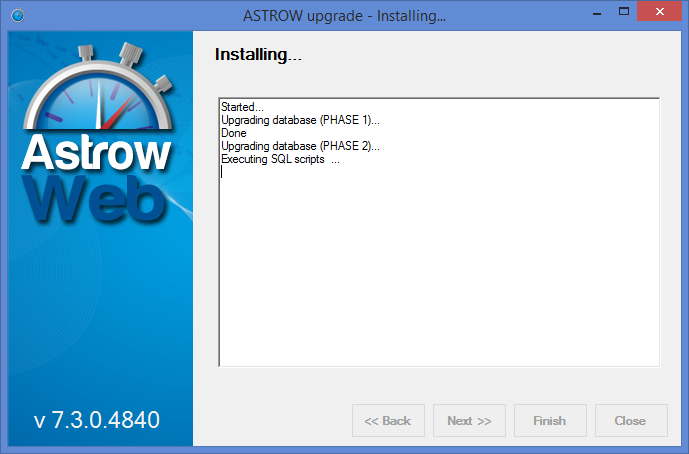
Step 14: Click Close to finish.
 |
|
Astrow Web Installer Setup, installation completed
|