When Installing for the First Time (New Database)
If you install Astrow for the first time, please follow the steps below:
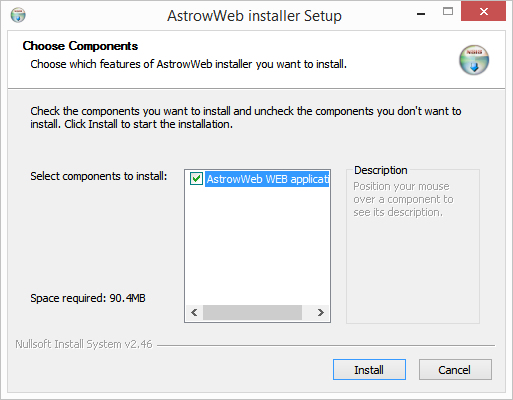
Step 1: Run AstrowWebSetup.exe with Run as administrator and click Install:
 |
|
Astrow Web Installer Setup, Choose components
|
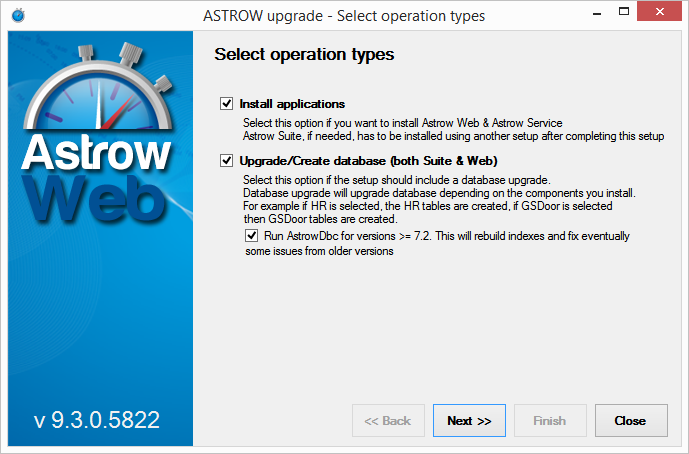
Step 2: Select the operation types and Next. If you only need to install Astrow without upgrading the database, please uncheck Upgrade/Create database.
 |
|
Astrow Web Installer Setup, selecting the operations
|
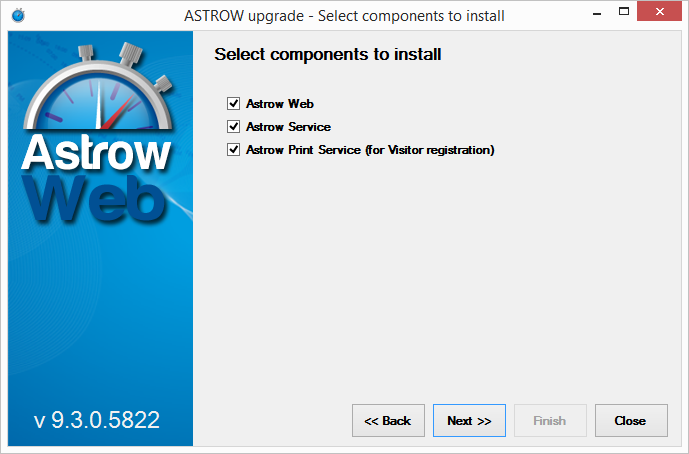
Step 3: Select the components and Next.
 |
|
Astrow Web Installer Setup, selecting the components
|
-
Install Astrow Web: installs Astrow Web on current location;
-
Install Astrow Service: installs Astrow Service on current location (you can have Astrow Web and Astrow Service on separate locations).
-
Install Astrow Print Service (for Visitor registration): installs Astrow Print Service, the service to connect the printer with Astrow. If you don't use the Visitors Registration Print license and service to print temporary labels for visitors, please uncheck this.
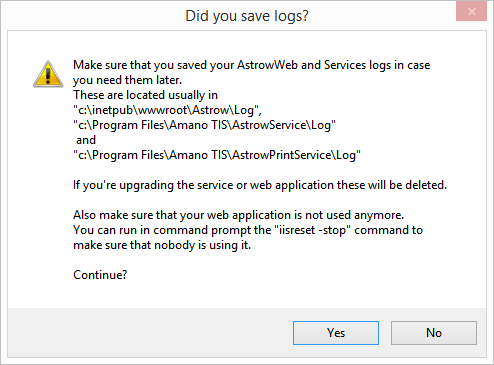
In case you upgrade the service or web application, please save the logs in c:\inetpub\wwwroot\Astrow and c:\Program Files\Amano TIS\AstrowNotificationService\Log. Also, make sure Astrow Web is not used by anyone. To check this, go to command prompt and execute iisreset-stop.
Click Yes on the confirmation message.
 |
|
Astrow Web Installer Setup, Before installation window
|
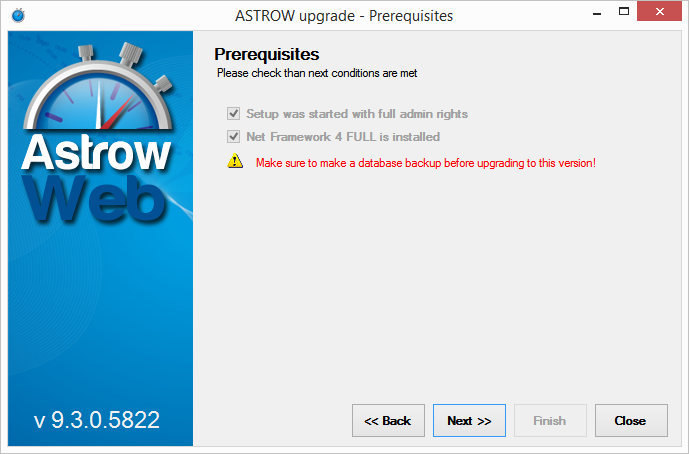
Step 4: Make sure you've run the setup with Run as administrator, and you have had installed .Net Framework 4 (see IIS and ASP.NET 4.0 Settings before Installing for more details). Click Next to continue.
 |
|
Astrow Web Installer Setup, prerequisites check
|
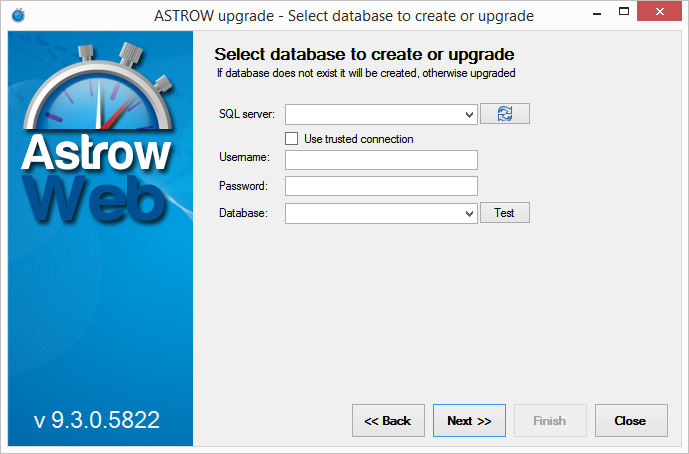
Step 5: You can now create a new database.
 |
|
Astrow Web Installer Setup, database screen
|
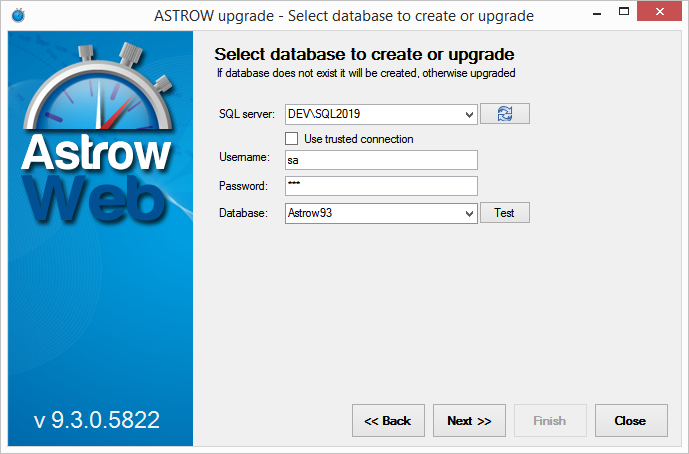
Select the database server and write the name of the database:
 |
|
Astrow Web Installer Setup, creating a new database
|
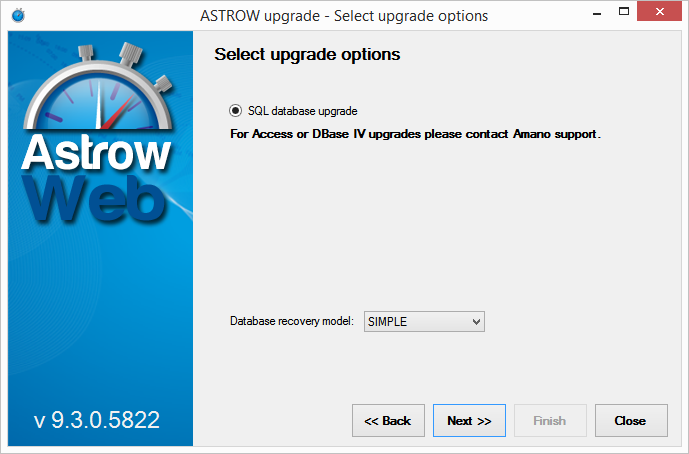
Step 6: Select the option SQL database upgrade and click Next.
 |
|
Astrow Web Installer Setup, selecting the upgrade options
|
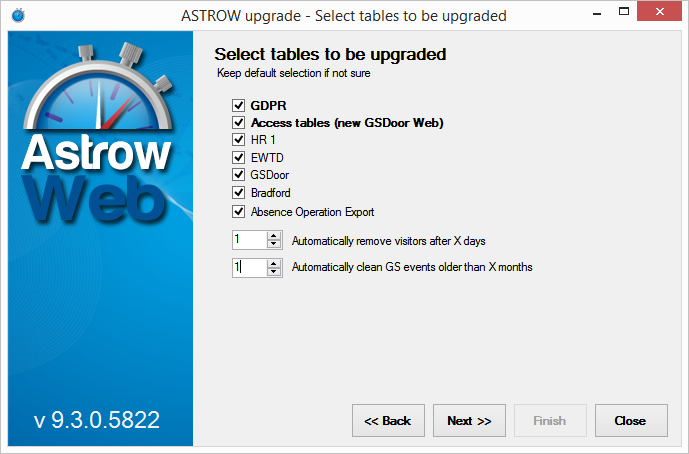
Step 7: Here you can choose the extra options depending on your license. Please note that if the tables are not created here, they won't work if the customer decides to acquire a license for any of them in the future. In this case, a database upgrade will be needed to create those tables.
 |
|
Astrow Web Installer Setup, tables screen
|
Here you can also set the number of days to remove the visitors' records or the number of months to remove all the GS events. Both can, later on, be changed in Settings - tab System config.
Select the tables you need and click Next.
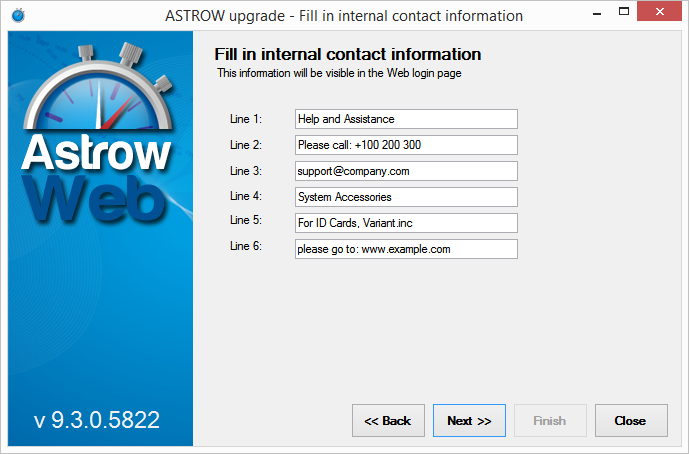
Step 8: Fill in the contact information to appear at login.
 |
|
Astrow Web Installer Setup, filling the information for login page
|
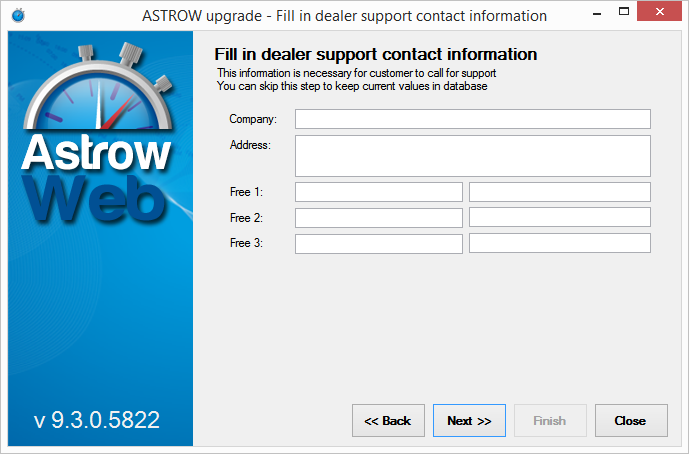
Step 10: Fill in the dealer support information to appear at Support and Information page in Astrow.
 |
|
Astrow Web Installer Setup, filling the dealer support contact information
|
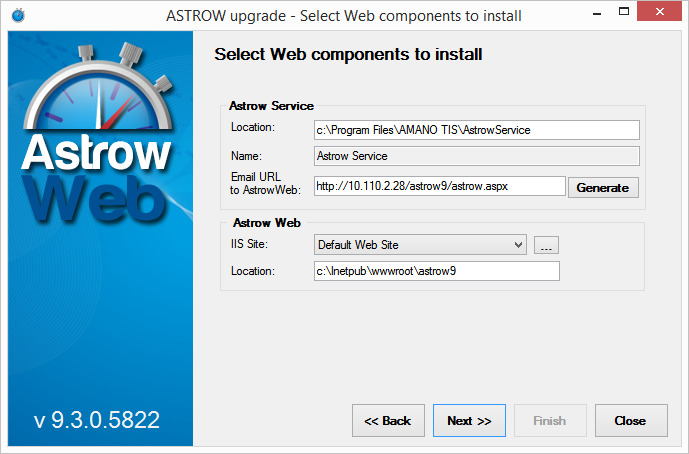
Step 11: Select the service location and the URL.
 |
|
Astrow Web Installer Setup, filling the location and URL for Astrow Service and Astrow Web
|
This will install AstrowWeb web application and register it within IIS by default in c:\Program Files\Amano TIS\AstrowService a service used to send notification emails. The URL will have the structure: <server name>/astrow/astrow.aspx. If you need to change the name of the link with: <server name>/[name]/astrow.aspx, you can change it from here.
Click Next to continue.
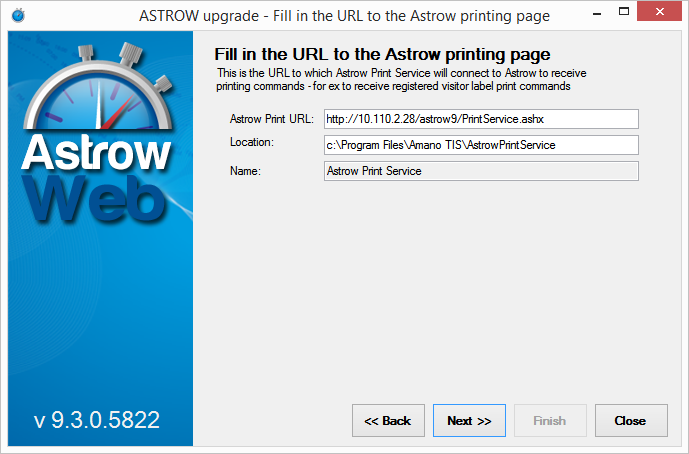
Step 12: This is the URL Astrow Print Service will connect to Astrow to receive printing commands. This is necessary only if you use a licence for Visitors Registration Print.
 |
|
Astrow Web Installer Setup, filling the URL for Astrow Print Service
|
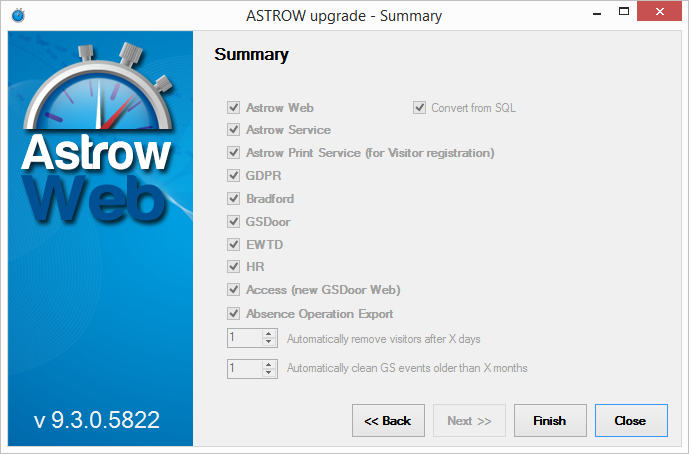
Step 13: Click Finish on the summary.
 |
|
Astrow Web Installer Setup, summary
|
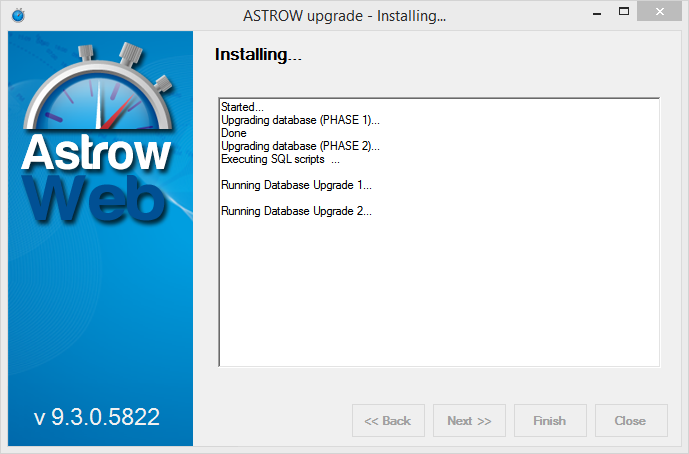
Step 14: Click Close to finish.
 |
|
Astrow Web Installer Setup, installation completed
|