Manual Installation
Astrow IO Service is compatible with Astrow starting version 8.2.
To install the tool, copy the kit in the desired location and follow the next steps:
Step 1: Copy the dll files (Astrow.dll and Business.dll) in C:\ - inetpub - wwwroot - Astrow - bin.
Step 2: Copy the Astrow.js file in C:\ - inetpub - wwwroot - Astrow and replace the existing one.
Step 3: Run the file Database.sql in your database.
Step 4: Run the AstrowIOServiceManager.exe with Run as administrator (please always run the exe with Run as administrator).
Step 5: When the tool is opened, click the button Install service to install the service and then click Save settings.
Step 6: Write the Astrow URL and click Save settings.
Here it is a description of the Astrow IO Service tool page:
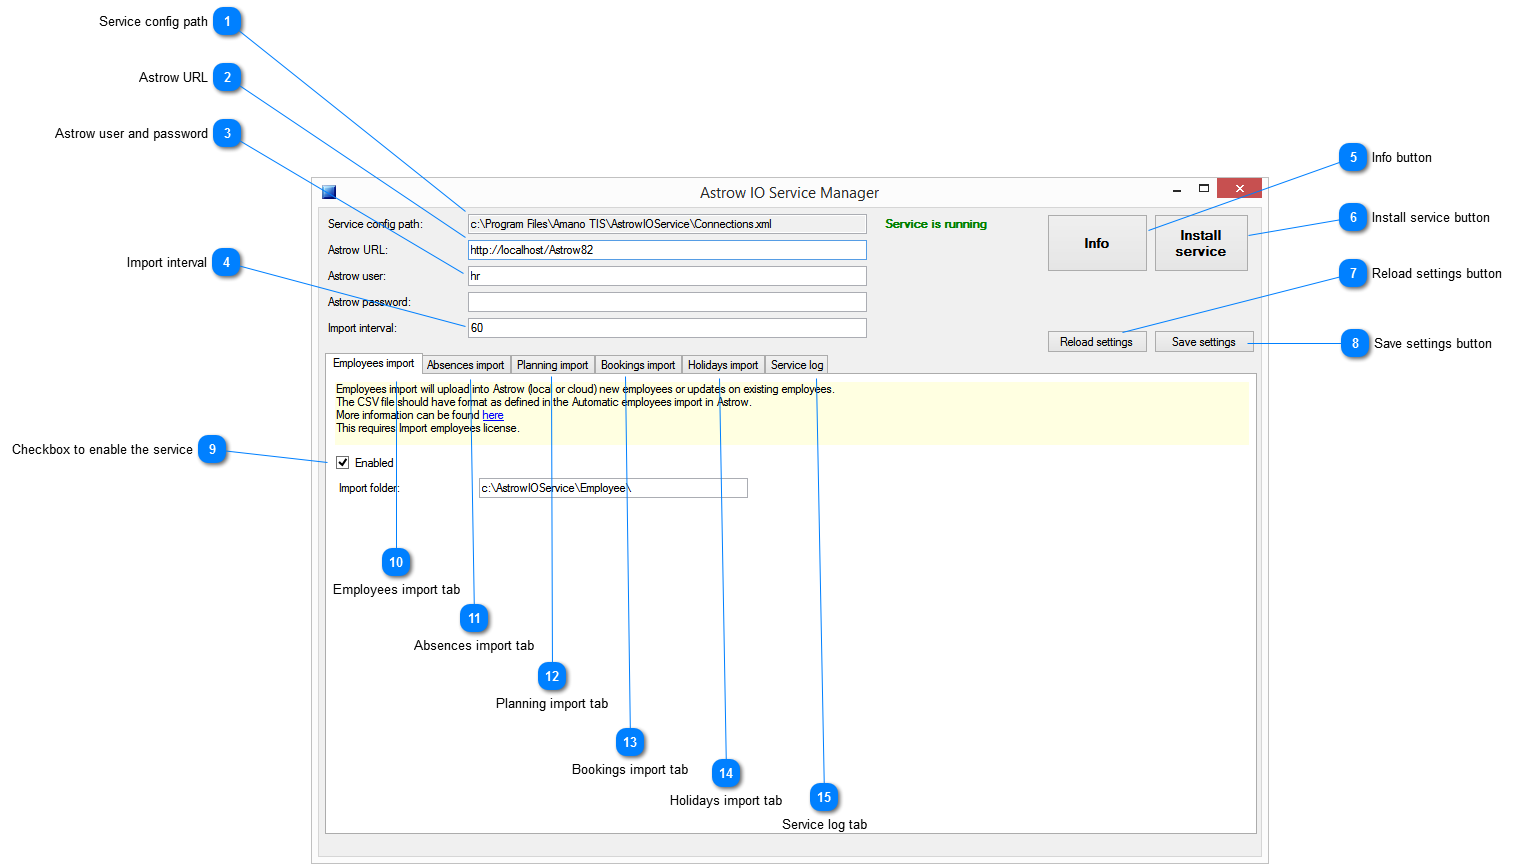


Employees import tabThis is the Employee import tab (see Automatic Import Employees).
|
Absences import tabThis is the Absence import tab (see Absences Import).
|
Planning import tabThis is the Planning tab (see Planning Import).
|
Bookings import tabThis is the Booking import tab (see Bookings Import).
|
Holidays import tabThis is the Holiday import tab (see Holidays Import).
|
Service log tabThis is the Service log tab (see Logs).
|