Here you can define the minimum amount of information to add an employee in Astrow. For multiple editing employees, see Multiple Editing Employees.
To add or change an employee system definition, go to Configuration - Employees- New/Edit - tab System.
Tab System - New/Edit Employee Window in Astrow Web
Some of this data can be selected from drop-down lists since these contain a number of predefined selections (e.g. department, terminal group, etc.). The following is a description of the fields:
Pers no.: Astrow Web automatically attributes this number after saving. This is a unique number and cannot be changed.
Full name:Here you enter the employee name. It is split in first, middle and last name. However, if you don't want to split it, add all name in the mandatory column. The order (last name, middle name, first name) when displaying the name will be set in Settings - System - Application config, parameter Employee name format (see Tab Application config.).
Badge no.:Here you enter the number of the badge/touch button the employee uses for booking. This badge may have a decimal or hexadecimal identification number.
To use hexadecimal badges you need to select the option Use hexadecimal badge numbers in Settings - System - System config.
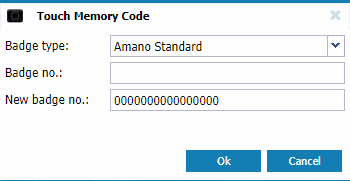
Click the button to fill in a badge number. The following window will open:
Touch Memory Code window in Tab System - New/Edit Employee Window in Astrow Web
Amano Standard: Select this option if your badge has a decimal code. Next, fill in the badge number and click Save. The decimal badge number now appears in the field.
Hexadecimal: Select this option if your badge has a hexadecimal code. To use hexadecimal badges you need to select the option Use hexadecimal badge numbers in Settings - System - System config. If this option was not checked, all the hexa codes found here will be converted in numerical ones.
Pac: Select this option if your badge has a hexadecimal code. To use hexadecimal badges you need to select the option Use hexadecimal badge numbers in Settings - System - System config.
Pin code: The PIN code is intended to be used as replacement for fingerprints that can be read with difficulties by the reader. Filling in this field is not mandatory. The PIN code must be unique for each person and can contain between 4 and 8 numerical characters. The PIN code is treated like a string, which means that 01234 is not the same as 1234. Pin code is used only for bio enrollment.
Authorization scheme: Here you can assign an authorization scheme to a new employee or change an existing one if there are definitions made. Click the button and select the scheme from the ones defined. If no records yet, just leave it blank. You can assign the employee when defining the authorization scheme.
Assigned user: Here you can link the employee to a user in Astrow Web. Click the button and select the user listed in the new window opened. If not existing, you can add one from there.
Use the button if you need to clear the selection.
Start calculation: Define the date to start calculation.
End calculation: Define the last day the calculation to be made. Leave the field unfilled for an active contract. Use the buttons or if needed.
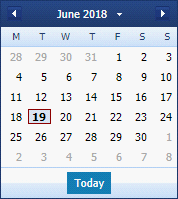
Bookings before and after those dates will not be taken in calculations. Use the calendars to define the dates to start/end calculations. You can search through previous month or next month . The button can help you easily select a date desired, if not the current year or month.
Navigation calendar option in Astrow Web
Employee no./Register no.:In both of these fields, you can enter internal employee codes (max. 8 characters), these fields are not mandatory.
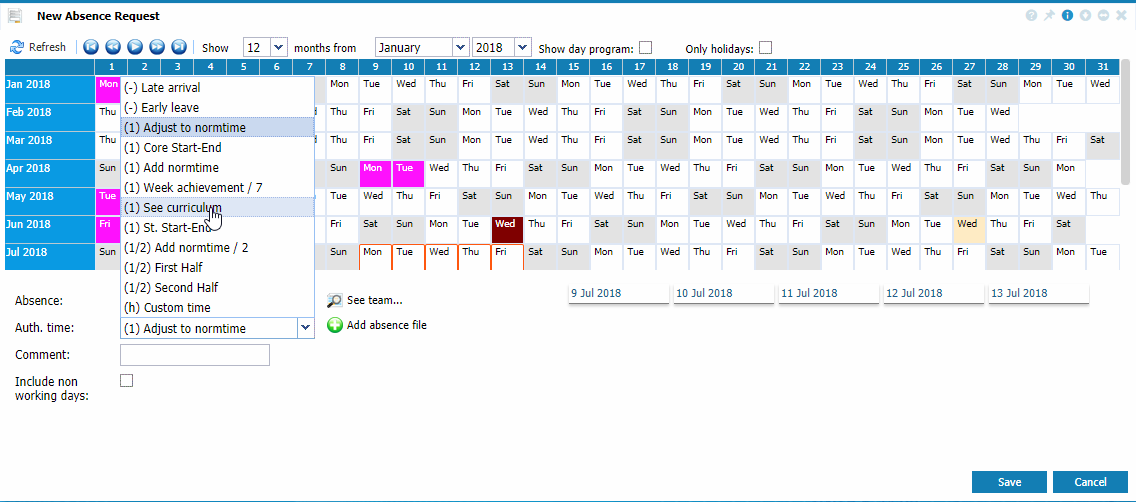
Absent time:You can use this field as a predefined duration for your absences.Here you can enter the number of hours and minutes that are used when adding an absence/absence request with the option See curriculum. Use the buttons to increase/decrease incrementally.
Example with adding an absence request with See curriculum option in Astrow Web
Department: Select the department the employee belongs to from the drop-down menu if there are any defined. If not, you can create one by clicking . See Add, Edit and Delete a Department for more details.
Terminal group: Select the terminal group from the drop-down menu if there are any defined. If not, you can create one by clicking . See Terminal Groups for more details.
Terminal display: Select the results group that contains the information the employee will receive when booking if there are any defined. If not, you can create one by clicking . See Result Group for more details.
Force location on mobile application: This refers to booking location on mobile application. If selected, the employee will be forced to add the location when adding a booking with VT on mobile, which will be visible in Daily View (see more at Daily View Window in Team Manager).
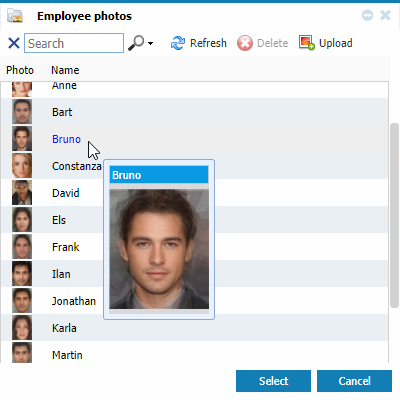
Picture: If you want to add an employee picture click below the photo. Here you can select a picture or upload a new one using the button .
Adding a picture to a new employee in Tab System - New/Edit Employee Window in Astrow Web
Cycle / Pay group / Chop group / Cost group:Here you can select the cycle, pay group, chop group or cost group the employee will use. See Cycles, Pay Groups, Chop Groups and Cost Center Codes for more details. Use the button to define the rules per periods. See the links below for more details about setting the calculation rules.
Cycle and Pay group are mandatory! Do not delete a cycle or pay group in use!
FTE: FTE (Full Time Equivalent) is a percent used in Norwegian specific exports (link FTE and Illness Control). Use the button to define the FTE used per periods.
To use FTE you need toselected the option Use FTE in Settings - System - System config.
Illness rules: For more details about this setting and the Norwegian Illness Control, see Illness Control.
Example tab System completed when adding a new employee in Employees window in Astrow Web
The contents of Tab System - Add and Edit an Employee